Saturday, October 28, 2006

Final fabrication....I hope.

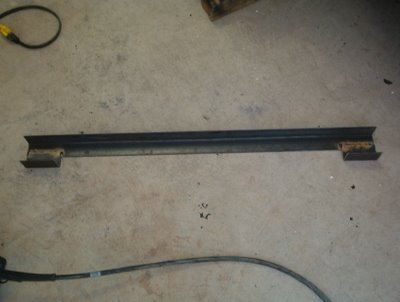
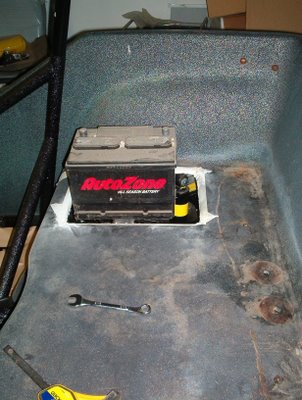
This last week I did, what I hope, will be the final Fabrication of any steel that might be on my car. I made a rear support out of two inch angled steel. This will be to support my battery and any other stuff that I might put in the rear of the car. Before I could fab the support, I had to cut out the recessed portion of the fiberglass in the rear of the car. I did this because the bottom was already cut out and also because my pan is IRS. These kits were originally designed for a swing axle car that didn't have the trailing arms my car does. If I was to leave the box recessed, my suspension would be hitting the bottom of the battery tray. My plan is to enclose the back and make it a trunk to house my battery, speakers, and for storage. I might even run my fuse panel back there as well. I think it will be easier to access for maintenance rather than installing it under the dash. The support runs from one shock tower to the other with M10 bolts installed where the Beetle body was originally bolted.

I also had to fab two brackets for the front of the car to support the fuel tank and fenders. These are bolted to the front beam and run up to where the tank will bolt in as well. I already had brackets welded to the beam in order to install my front bumper.
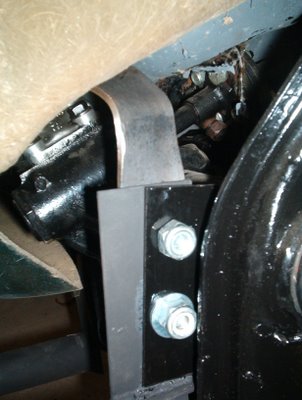


When I was done with all the steel fabrication. I threw everything together for a test fit in order to make sure it was all going to work. I must say...This thing is starting to look like a car.


SWEET!

This week I plan to make to windshield backing plates and get some fiberglass work done. I should have all my engine parts by next week and have the thing bolted up with any luck.

By the way, if you ever need a windshield for any of theses cars, call Dino. He will make you one for a custom fit. He did mine and I couldn't be happier. They say he makes all the windshields for the manufacturers of buggies out there anyway. You might as well go straight to the source.

Bug Shields by Dino
Dean Burdett
(714) 854-0519

What moves you dude?

I took apart my engine. It was pretty easy for me. Long ago, when my car was still a bug, I built an engine stand out of wood and it worked really well for me when it came time to break down my engine.


My car really ran well when I pulled it off the road (aside from the clutch.) I was confident that there would be few, if any, major issues involving the engine itself. I was tempted to just leave it be and just swap out the clutch. I, however, really wanted to get the experience of taking the thing apart and putting it back together. It's a good thing I did. As I broke it down I was excited to see that everything appeared to be in great shape. The cylinders were nice and clean with no cracks or marks. The rings seemed to be nice and tight. The heads looked good, from what I could see. They were pretty gunked up from carbon. The end play seemed alright. The crank had a little scoring on it but looked like it could be ground down some. The rods looked fine as far as I could tell. I was a little disappointed that I broke it down at all.

It turns out that everything but the cylinders and pistons are junk. The heads had several cracks under the carbon as well as busted up valve guides on one. The crank just isn't worth machining since I can get one for less than it would cost to machine the old one. The rods might be OK I just don't know. Basically, the only thing I'm reusing is the case. I took it to a local VW guy to have it machined for the main bearings and bigger cylinders that I'll be putting in it. So I found an engine kit that pretty much covers the whole deal here. With the machine work and new heads, I'm going to be into this thing for about eleven hundred dollars. I've done a lot of research into performance mods for VWs and learned a ton. There's a wealth of information here.


I decided on a 1776cc engine kit. there are several reasons for this. First, My car might weigh 1400 pounds when I'm done so I won't need too much power to push it along. Second, everything I've read leads me to believe that the 1776 option is a reliable upgrade. Third, this car is going to be a weekend warrior. It will never be out in the rain unless I just happen to get caught in it. So dependability, while valued, just isn't critical. Fourth, in my opinion, there are benefits to going the cheap route. This might seem stupid to some but there is method to my madness. I've never built an engine before. So I'm basically planning on screwing it up. It's better to ruin a forty dollar part than a four hundred dollar part. As I get better, I plan on getting more valuable equipment.

So here are the specs for my engine.
- New 90.5mm Forged piston & cylinder kit
- New 69mm counterweighted, 8 dowel crankshaft
- New forged I-Beam connecting rods
- New stock Camshaft
- New lifters
- New pushrods
- New heavy duty oil pump
- New gasket kit with silicon rear main seal
- New heads bored for the bigger jugs
- New dual 40mm Kadrons
- New stock clutch
- Old case align bored, thrust cut, and cleared for the bigger cylinders
- Old 4 dowel flywheel machined for 8 dowel crank
- Old rockers
- Old Spin on filter kit
- Old doghouse and new tin
- Old accessories (starter, alternator, dizzy, ect.)

Assembly will start in a couple weeks.

Saturday, October 07, 2006

All we have to fear is...Every car on the road.

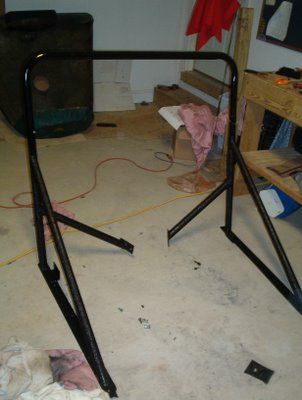
I thought long and hard about the safety aspects of my, decidedly unsafe, car. I'm a good driver and have never been in an accident that was my fault. That hasn't stopped other idiots from hitting me though. I definitely was going to put a roll cage in my car. The purpose of said cage would be to protect passengers in the unlikely event of an accident not to save me in case I roll my car I. Somehow a 1/4 inch piece of fiberglass between me and little miss soccer mom in her 7000 lb Chevy Tahoe didn't seem like enough protection. My original plan was to build a full custom cage for my car. Two things stopped me. One was the amount of work and money involved with building such a cage and the other was the issue of looks. I like the single hoop look. I think it's clean and neat. The KISS (Keep It Simple Stupid) look is what I'm going for here. I want the car to look like what it is. Minimalist.

I thought about my cage and looked into several different options. The simplest idea was to just buy one from the Manx club and bolt it up. While the price was fair, I would've been eaten alive on shipping. I also had the Idea to modify a jeep cage or a truck light bar to get the job done. But they were all the wrong size. In the end, I decided to build my own. I came up with a design that would run along the lip of my floors and bolt through the angled steel that I used as side channels. The main hoop only required two bends and I learned a technique to do that here. I ordered some 1 1/2 inch .095 DOM tube in three different lengths. One twelve Ft. for the main hoop, two four Ft. for the sides, and a three Ft. piece to run from the main hoop to the tunnel. I also bought an eight Ft. piece of 2" x 1/4" steel to use along the bottom. I think the grand total was about $125 for all the steel and twenty bucks for the muffler shop to bend it.


The hardest part about building the cage was the notching of the pipes. I had to do it by hand with my trusty (now on my second because I wore out the original) die grinder with three inch cutting wheel. It took forever but I'm amazed at the results. I think this is a fantastic set up for my buggy. The side tubes give me piece of mind in the event of a side impact and the two short pieces bolted to the main tunnel will make sure it doesn't just crumple. Hopefully, if I do take a low speed impact from an SUV, it will displace my whole car instead of coming through my 1/4" of fiberglass a squashing me. I'm not disillusioned about a high speed impact. I know that will be bad no matter how much steel I put in the thing. A 1500lb dune buggy vs. 7000lb SUV is just a simple matter of Newton's law.


When mocked up on the car, the main hoop is pretty much all that's visible so it looks nice and old school.

One interesting thing I learned building this is that a welder can actually give you a sun burn.

That pan is clean enough to eat off of.

I bought a new set of brake lines to install on my car. When I ordered them, I didn't think and just ordered a set for a '68 beetle. I forgot that standard bugs of that year are not IRS when I place my order. So the lines that I received weren't the exact fit. What it all amounted to was I had to go to my local auto parts store to supplement the kit with two longer lines. Not a big mistake, but still a couple more bucks in the hole for not thinking things through. Now, when I'm ordering parts, I think of my car as a '69 and it helps me remember to think straight. Running the lines wasn't all that difficult. The long main line was the most fun because it's a little longer than it needs to be. I was too cheap to buy the proper brake tube bender for the project. I made all the bends using the radius of my Maglite flashlight. Worked pretty well I think.

My car has a dual master cylinder for the brakes. I read that you can use a either a Volvo or a Rabbit reservoir instead of running two lines and having a remote mount like stock. I found the Volvo type I needed at the local pull-a-part yard for a whopping four bucks. Good times!

Once the lines were run, I painted and installed my brake drums (with high heat paint), and installed installed the freshly painted shocks. I also installed and filled my trany as well as new CV axles (painted as well). I top coated the POR-15 on the top of the pan with more bedliner and put my wheels on. I must say that I'm starting to get excited as the pan is getting close to completion.


Sweet!