Measure 150 times. Cut once.
When it came time to actually cut my tunnel in half, I was a little nervous to say the least. I knew, once I made that cut, there was no going back. So I read reread and read again the instructions on the Manx club site. I whipped out my tape measure and my big level. I test mounted my Clodhopper body and measured the length I would need to cut from my pan. I took the body off, put it back on and measured again to make sure I was right. When I was satisfied, I came up with 14 1/4 inches to be cut out. Different body styles require different lengths. Even if mine came with instructions, which it didn't, I still would have test fit it to make sure nothing was funky with my particular pan. I measured everything and made sure I could duplicate it when I finally did cut the section out. I turns out that my pan was a little off in the stock configuration. It is a little more than 1/16 of an inch longer on the passenger side.
Distances were recorded from the front shock towers to the rear shock supports where the beetle body was originally attached. I took measurements straight from one bolt hole to another and in an "X" pattern as well. I also recorded some secondary measurements in the same fashion. These were made on the tunnel itself.
Before I did all of this I built four of these out of scrap wood my wife had. (Thanks babe!)
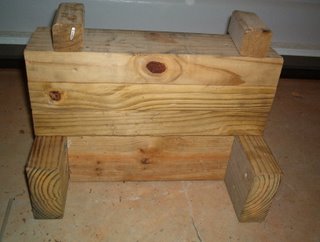
I fit them under my brake drums on all four wheels and also cut some small wedges out of 1x4" pieces (those wedges have come in handy for a million other little things along the way as well.) I used the wedges to jam under the drum blocks in order to level the car on all four sides. It worked out great and allowed me to use both my floor jacks to fit the car back together and fine tune for welding when the time came. When I made my cuts, I used my handy dandy die grinder. Even if I had a reciprocating saw I still would've used the grinder because I definitely didn't want to cut any of the lines running through the tunnel. In the end it all worked out fantastic and I was very pleased with the results. One thing I did different was to weld a portion of my cut out to the top of the tunnel as a reinforcement. It isn't beautiful but will barely be noticeable with the seats installed.
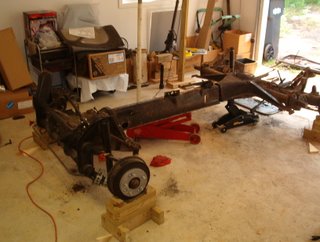
Here you can see the tunnel after my cut. If you look closely you can see the wedges for leveling next to my drum blocks.
Clean cut, no lines hurt.

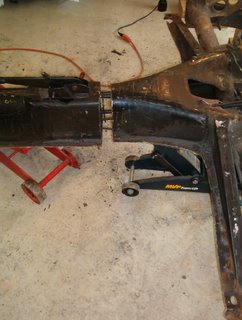
Finished with welding. Measured and tacked it before running the final beads. Note the cut out peice I welded to the top to help reinforce it. This was made from a protion I cut out you can see the old hole where the seat belts originally ran.
posted by Buggy Glenn @ 11:20 AM
0 comments
![]()

0 Comments:
Post a Comment
<< Home